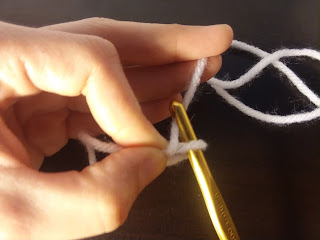
Here's a video, as well as pictures and written instructions.
I'm right handed, so I'm going to pick up the yarn a few inches from the end with my left hand, so the tail is poking out by my pinkie and the working end is coming out by my thumb.
With my right hand, I'm going to wrap the working end of the yarn loosely around my left index finger to make a loop. Notice that the working end of the yarn passes in front.
Now I'm going to pull my left index finger back to pinch the loop closed. The loop should be nice and open and nothing should be covering it now.
Next, I'll pick up my crochet hook in my right hand and push the hook through the loop from the front. That means I'm pushing the hook away from myself to go through the loop.
I'm going to use the hook now to grab the working end of the yarn. This is very important! Make sure you grab the working end and not the tail end!
Next, I'll pull the hook back towards myself so the working end of the yarn comes through the loop.
Finally, I'll pull on both ends of the yarn to tighten the knot and form a loop of yarn around the crochet hook.
And that's it! You now have a slip knot on your hook, ready to start a beautiful crochet project!


No comments:
Post a Comment